ブログ

割とコンピュータよりの情報をお届けします。

2021年

Windows 10 2004以降のコルタナさんの仕様変更?

Windows 10 のアップデートをインストールしたら「コルタナさん」という呼びかけでコルタナさんがアクティブ化できなくなった.

最近サブに使っているパソコンにWindows 10の20H2が降ってきた.順次アップデートの配信がされているらしい.特に古いバージョンを使っている場合にはアップデートを勧めてくるみたい.
Windows 10 20H2のアップデートをインストールしたら「コルタナさん」という呼びかけでコルタナさんがアクティブ化できなくなっていることに気が付いた.

メインも2004になっていてすでに呼びかけでアクティブ化できなくなっていたようだ.そういえば,しばらく呼びかけていなかった.

しばらくこの仕様のままになるようだ.ただコルタナの設定では「今後のアップデートに追加されます。」と表示されるので
アップデートを期待しています.

≫ 続きを読む

2021/03/27 日記   TakeMe

WebView2ランタイムで音声読み上げ Vol. 2

WebView2なら音声読み上げを入れることができる.SAPIの代わりに使いたい場合には動的にJavaScriptを実行するようにならないといけないな。と思って修正.

SAPIの代わりに使う場合には,WebView2.CoreWebView2.ExecuteScriptAsyncを使えばよい.
例えとして下にサンプルを示す.
ただし,この例では毎回var synthes = new SpeechSynthesisUtterance()とやっているので注意して.オーバーヘッドが大きい.
もともとWindows 10の場合にはすでにSAPIがあるので読み上げ機能を使うだけでやるのは意味はない.

using System;
using System.Collections.Generic;
using System.ComponentModel;
using System.Data;
using System.Drawing;
using System.IO;
using System.Linq;
using System.Text;
using System.Threading.Tasks;
using System.Windows.Forms;

namespace WindowsFormsApp1
{
    public partial class Form1 : Form
    {
        public Form1()
        {
            InitializeComponent();

            string path = Directory.GetCurrentDirectory();

            path = path + @"\\index.html";

            this.webView21.Source = new Uri(path);
        }

        private async void button1_Click(object sender, EventArgs e)
        {
            string text =
                "var synthes = new SpeechSynthesisUtterance('こんにちは');" +
                "speechSynthesis.speak(synthes);";
            await this.webView21.CoreWebView2.ExecuteScriptAsync(text);
        }
    }
}


WebView2.CoreWebView2.ExecuteScriptAsyncがつかえるのはページを読み終わって表示し終わってからだと思う.その前に実行すると例外が発生すると思う.

SAPIだけでやる場合には以下のように行うのです.

using System;
using System.Collections.Generic;
using System.Linq;
using System.Text;
using System.Threading.Tasks;

namespace ConsoleApp2
{
    class Program
    {
        static void Main(string[] args)
        {
            SpeechLib.SpVoice sp = new SpeechLib.SpVoice();
            sp.Speak("アレクサ。今なんじ");
        }
    }
}

≫ 続きを読む

2021/03/27 コンピュータ   TakeMe
タグ:Windows Forms

WebView2ランタイムで音声読み上げ

昔はCefSharpで試していたが,今度はWebView2ランタイムで読み上げを試してみる。(いまCefSharpがどうなっているのかは知らない)

例えばindex.htmlを作って以下のように書いておくと「こんにちは」と読み上げてくれるようになった。

<html>
<head>
    <script>
        var synthes = new SpeechSynthesisUtterance('こんにちは');
        speechSynthesis.speak(synthes);
    </script>
</head>
<body>
    TEST
</body>
</html>

Windows 10でこれができるのは当たり前でしかもSAPIも標準で使用できるのでわざわざ読み上げだけを使いたいときにWebView2ランタイムを使うことはないが,Windows 7でもこれができるなら便利である。
Windows 7では標準で読み上げできないから...WebView2ランタイムが操るMicrosoft Edgeの力を借りて読み上げを実装する ということ...

≫ 続きを読む

2021/03/21 コンピュータ   TakeMe

CefSharpよりWebView2が標準に移っていくのか?

前にWebBrowserコントロールがあまりに古いのでCefSharpを使うということでアプリを作っていたが,ようやくWebView2がやってきたらしい。

.NET Frameworkでアプリを作っているとWebアプリの要素を取り込みたくなることがある。
ところが,WebBrowserコントロールはInternet Explorerの機能を使用しているのでなかなか新しい機能を盛り込んだWebアプリの機能の仕様が難しかった。

そのため,今のところCefSharpを使っている(1)(2)(3)...等。

ところが,WebView2を使えば割と新しいWebブラウザの機能(Edge)が使用できる。
WebView2ランタイムをインストールした上で,Visual Studioのプロジェクト側ではnugetでWebView2をインストールする。

「Edgeが必要なので当面は古いWindows Embedded Standard 7デバイスの保守向け対応では使えない。ますますWindows 10向けの開発は楽になり,古いシステムへの対応が難しくなる。」
と思っていたが,一応WebView2ランタイムはWindows 7およびWindows 8も対応らしい
ただし,各バージョンのWindows用のEdgeのインストールが必要である。Windows 10以外向けのMicrosoft Edgeは昨年から配信が始まっている。

≫ 続きを読む

2021/03/21 コンピュータ   TakeMe

ZXing.netでQRコード遊び

ちょっと古いネタだけどQRコードにどれだけ文字を詰められるのかを調べていたら,nugetでないかなーと調べたらQRCoderというのが先に出てきて試していたが,オーバーフローしても何も出てこない。

Zxing.Netがの方が作り込まれている。これが一番簡単な例。

だいぶん前にQRコードを使うために使用したけど,忘れていた。そのため最初にQRCoderを使っていたがなかなか使い勝手が悪い。通常の長さの文字列なら問題ないが長くなってくるとスマホで読まなくなる現象が発生。
結局前に使ったのはどんなバーコード作成ライブラリだったのかを調べてZXingだった。そして参考ページを探した。
ZXing.NETをnugetで入れて,例えば,以下のように使用する。

using System;
using System.Collections.Generic;
using System.ComponentModel;
using System.Data;
using System.Drawing;
using System.Linq;
using System.Text;
using System.Threading.Tasks;
using System.Windows.Forms;
using ZXing;

namespace ZxingTEST
{
    public partial class Form1 : Form
    {
        private BarcodeWriter qrcode;
        public Form1()
        {
            InitializeComponent();

            qrcode = new BarcodeWriter
            {
                Format = BarcodeFormat.QR_CODE,
                Options = new ZXing.QrCode.QrCodeEncodingOptions
                {
                    ErrorCorrection = ZXing.QrCode.Internal.ErrorCorrectionLevel.Q,
                    CharacterSet = "UTF-8",
                    Height = 320,
                    Width = 320,
                    Margin = 2
                }
            };
        }

        private void button1_Click(object sender, EventArgs e)
        {
            pictureBox1.Image = qrcode.Write(this.textBox1.Text);
        }
    }
}

QRCoderではオーバーフローがどうなっているのか不明だが,ZXing.NETでは例外が返るようになっていた。正しく伝達できるかは、読み取り側のソフト次第だが日本語も書き込みできる。

≫ 続きを読む

2021/03/21 コンピュータ   TakeMe
タグ:Windows Forms

Wix Toolsetでパスが存在したらインストール先を変更する方法

Wix Toolsetを使ってインストーラを作成していたら,Product要素内で<UIRef Id="WixUI_Mondo" />を追加してFeature要素のConfigurableDirectory属性に"INSTALLFOLDER"などインストールするディレクトリIdを指定しているとインストール中にインストール先を指定することができるようになる。
<Property Id="INSTALLFOLDER" Value="L:\Program Files"/>などにしていればデフォルトインストール先を変えることもできるが,L:\がない場合にはインストーラそのものが異常終了してしまう。

この時の変更するのは
<Property Id="INSTALLFOLDER" Value="L:\Program Files"/>
の置き換えである。次のようになる。

        <Property Id="DIRECTORYEXISTS">
            <DirectorySearch Id="CheckFileDir" Path="L:\" Depth="0" AssignToProperty="yes"/>
        </Property>
        <SetProperty Id="INSTALLFOLDER" After="AppSearch" Value="L:\Program Files">DIRECTORYEXISTS</SetProperty>

L:\があるかどうかを確認してそれをDIRECTORYEXISTSに格納する。その結果をもとにしてINSTALLFOLDERを設定しなおす。

このようにしておくと,L:\が存在すればL:\Program Filesがインストールディレクトリになるけどない場合にも異常終了に至ることはない。

≫ 続きを読む

2021/03/14 コンピュータ   TakeMe

WPF 文字列の入ったResourceDictionary.xamlファイルをテキストファイルのまま同梱する方法

WPFのResourceDictionaryに文字列を追加することも可能らしい.
ResourceDictionaryを記述するxamlファイルは,普通はビルドの時にアッセンブリファイルにくっつける。
このとき,WPFのリソースを提供する場合にはxamlファイル(テキストファイル)のまま提供することもできるみたい。

ResourceDictionaryを記述するxamlファイルは,テキストファイルのまま同梱できるらしいのだ。

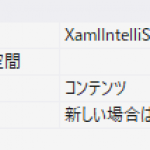
Xaml_file_as_a_textfile_buildaction.png

xamlファイルのビルドアクションをコンテンツに直して出力ディレクトリにコピーする。

そして,例えばリソースに以下のように追加するだけ。
(この場合には出力ディレクトリをルート(/)として/Resoures/Resources.xamlにコピーされるファイルをResourceDictionaryとして読み込み)

<Window.Resources>
        <ResourceDictionary Source="/Resources/Resources.xaml" />
    </Window.Resources>

ウインドウのリソースに書いているとウインドウが生成されると時に読まれる。
このようにしておくとビルド環境がない場合にも文字列だけはその場でなおせる(かな)。
※文字列だけでなく,通常のResourceDictionary.xamlの記述内容なら変更可能なので言語によって文字列を変えるだけでなく言語を変えたところ同じ意味を表す文字列の長さが変わった場合にそれを収めるBorderのサイズを変えるとか文字サイズを変えるとか絵やアイコンをかえるとかも一応可能

画像ファイルについては単独でアッセンブリファイルに同梱できる。 以下の例では/Resouces/sample1.pngにファイルを入れている。

            <TextBlock Text="{DynamicResource test_string1}">
                <TextBlock.Background>
                    <ImageBrush ImageSource="/Resources/sample1.png"/>
                </TextBlock.Background>
            </TextBlock>

≫ 続きを読む

2021/03/13 コンピュータ   TakeMe
タグ:WPF

Windows Forms用のVisual Studio データソース構成ウィザード

Windows Formsのアプリケーションを作っていて,データバインディングを使ってみたが,Visual Studio データソース構成ウィザードはAny CPU構成しか対応していないかもしれない。

ある日,Windows Formsのアプリケーションを作っていて,データバインディングを使ってみた。
x64用限定にしようと思って,構成マネージャでx64構成を作成してプロジェクトのプロパティを変更していた。

Visual Studio データソース構成ウィザードでx64構成ではオブジェクトが一覧に出てこない。

やり方を間違えたかと思ってうろうろしていたが,結局ウィザードがみているのはAny CPU設定の時の標準の出力パス bin\Debugやbin\Release ディレクトリ。
そこにオブジェクトがないといけないようだ.
(普通そんなこと気付くかな)

対象プラットフォームだけをx64にしている場合には出力パスは変化しないので問題にならない(はず)。構成マネージャでx64を新規作成してそれを選択した状態でビルドすると時々起こる.

≫ 続きを読む

2021/02/27 コンピュータ   TakeMe
タグ:Windows Forms

Python for .NETの新しい話 Vol. 2

Pythonでsgolayフィルタを使ってみた..NETでもオープンソースのコードがないかなと思っていたのですが,なかなか見つからなかったのでscipyのコードを使うことにしてみた.

自分で探していたけど「SciPy で Savitzky-Golay フィルタ」という参考にmodeなるものも指定できることが分かった.SciPyの方が簡単かな


やっぱり簡単.ただし,Scipyはかなりストレージを使う.これを小さくできたらよいのだが...

C#側のコードは次のような感じにしてみた.

using System;
using System.Collections.Generic;
using System.ComponentModel;
using System.Data;
using System.Drawing;
using System.IO;
using System.Linq;
using System.Reflection;
using System.Text;
using System.Threading.Tasks;
using System.Windows.Forms;
using Python.Runtime;

namespace SgolaySample
{
    public partial class Form1 : Form
    {

        public Form1()
        {
            InitializeComponent();

            System.Windows.Forms.DataVisualization.Charting.ChartArea chartArea1 = new System.Windows.Forms.DataVisualization.Charting.ChartArea();
            System.Windows.Forms.DataVisualization.Charting.Legend legend1 = new System.Windows.Forms.DataVisualization.Charting.Legend();
            System.Windows.Forms.DataVisualization.Charting.Series series1 = new System.Windows.Forms.DataVisualization.Charting.Series();
            System.Windows.Forms.DataVisualization.Charting.Series series2 = new System.Windows.Forms.DataVisualization.Charting.Series();
            this.chart1 = new System.Windows.Forms.DataVisualization.Charting.Chart();
            // 
            // chart1
            // 
            chartArea1.Name = "ChartArea1";
            this.chart1.ChartAreas.Add(chartArea1);
            legend1.Name = "Legend1";
            this.chart1.Legends.Add(legend1);
            this.chart1.Location = new System.Drawing.Point(12, 12);
            this.chart1.Name = "chart1";
            series1.ChartArea = "ChartArea1";
            series1.ChartType = System.Windows.Forms.DataVisualization.Charting.SeriesChartType.Point;
            series1.Legend = "Legend1";
            series1.Name = "Series1";
            series2.ChartArea = "ChartArea1";
            series2.ChartType = System.Windows.Forms.DataVisualization.Charting.SeriesChartType.Line;
            series2.Legend = "Legend1";
            series2.Name = "Series2";
            this.chart1.Series.Add(series1);
            this.chart1.Series.Add(series2);
            this.chart1.Size = new System.Drawing.Size(446, 206);
            this.chart1.TabIndex = 0;
            this.chart1.Text = "chart1";


            this.Controls.Add(this.chart1);

            string strPath = Environment.GetEnvironmentVariable("PATH");

            string appDir = Directory.GetParent(Assembly.GetExecutingAssembly().Location).FullName + @"\python";

            Environment.SetEnvironmentVariable("PATH", Path.PathSeparator + appDir, EnvironmentVariableTarget.Process);


            List<double> x = new List<double>(); // Python listへの変換予定
            List<double> y = new List<double>(); // Python listへの変換予定

            Random random = new Random(0);
            for (int i = 0; i < 400; i++)
            {
                x.Add(0.01 * i);
                y.Add(Math.Sin(2.0 * Math.PI * x[i] / 1.0) + random.NextDouble());
            }

            using (Py.GIL())
            {
                dynamic sys = Py.Import("sys");
                // sample.pyを置くフォルダをパスに追加
                sys.path.append(Directory.GetParent(Assembly.GetExecutingAssembly().Location).FullName);
            }

            using (Py.GIL()) 
            {
                dynamic sample = Py.Import("sample");
                dynamic ya = sample.filterA(y); // numpy.arrayで返ってくる予定

                for (int i = 0; i < x.Count; i++) {
                    chart1.Series[0].Points.AddXY(x[i], y[i]);
                    chart1.Series[1].Points.AddXY(x[i], ((double[])ya)[i]);
                }
            }
        }
    }
}

sample.pyの例

import numpy as np
from scipy import signal

def filterA(y):
    ya = signal.savgol_filter(y, 101, 5);
    return ya;

≫ 続きを読む

2021/02/22 コンピュータ   TakeMe

Python for .NETの新しい話

だいぶん前に「PythonからC#で書いた.NET Framewokのクラスライブラリを読みだす」1つ目2つ目
では.NET Frameworkのプログラムを読み出すことだった。

逆の「C#からPythonの関数を呼び出し」は更新が追い付いていないといって最新版をとってきていた。
多少最新バージョンからバージョンがずれていてもよいならpythonnet_py37_winなどなどnugetで入れられるようになっていた。むしろこちらの方が簡単だな。

nugetパッケージは.NET Frameworkならpythonnet_py37_winだし.NET Coreならpythonnet_netstandard_py37_win
やっぱりnugetパッケージは簡単.ただし,embeddable pythonをビルドターゲットフォルダに持ってきている。この参考でscipyまたはnumpyをインストールした方が便利。

ターゲットに入れて一緒に持ち運び....(scipyまで入れると相当 大きい)

using Python.Runtime;
using System;
using System.Collections.Generic;
using System.IO;
using System.Linq;
using System.Reflection;
using System.Text;
using System.Threading.Tasks;

namespace PythonEmbedSample
{
    class Program
    {
        static void Main(string[] args)
        {
            string strPath = Environment.GetEnvironmentVariable("PATH");

            string appDir = Directory.GetParent(Assembly.GetExecutingAssembly().Location).FullName + @"\python";

            Environment.SetEnvironmentVariable("PATH", Path.PathSeparator + appDir, EnvironmentVariableTarget.Process);

            using (Py.GIL())
            {
                PythonEngine.RunSimpleString("print('SAMPLE')");
            }
        }
    }
}

python37._pthの#import siteのコメントアウトを解除して,https://bootstrap.pypa.io/get-pip.pyをもらってきて,...
embeddable pythonのディレクトリでpython get-pip.pyを実行して,
python -m pip install scipyを実行して... scipyを使えるようになった

例えば,sample.pyを作る splineで補間する例を追加してみた.

import numpy as np
from scipy import interpolate

def spline(x, y, xi):
    x = np.array(x);
    y = np.array(y);
    xi = np.array(xi);
    f = interpolate.interp1d(x, y, kind="cubic", fill_value="extrapolate")
    yi = f(xi);
    return yi;

そしてC#の側を次のようにいじってsample.pyのモジュールを読み込むようにする.

using Python.Runtime;
using System;
using System.Collections.Generic;
using System.IO;
using System.Linq;
using System.Reflection;
using System.Text;
using System.Threading.Tasks;

namespace PythonEmbedSample
{
    class Program
    {
        static void Main(string[] args)
        {
            string strPath = Environment.GetEnvironmentVariable("PATH");

            string appDir = Directory.GetParent(Assembly.GetExecutingAssembly().Location).FullName + @"\python";

            Environment.SetEnvironmentVariable("PATH", Path.PathSeparator + appDir, EnvironmentVariableTarget.Process);

            using (Py.GIL())
            {
                dynamic sys = Py.Import("sys");
                // sample.pyを置くフォルダをパスに追加
                sys.path.append(Directory.GetParent(Assembly.GetExecutingAssembly().Location).FullName);


                dynamic sample = Py.Import("sample");
                
                List<double> x = new List<double>(); // Python listへの変換予定
                List<double> y = new List<double>(); // Python listへの変換予定

                for (int i = 0; i < 10; i++)
                {
                    x.Add(0.1 * i);
                    y.Add(Math.Sin(2.0 * Math.PI * x[i] / 1.0));
                }

                List<double> xi = new List<double>(); // Python listへの変換予定
                for (int i = 0; i < 100; i++)
                {
                    xi.Add(0.01 * i);
                }
                dynamic yi_ = sample.spline(x, y, xi); // numpy.arrayで返ってくる予定
                List<double> yi = new List<double>(); // List<double>への変換は暗黙的にできないため
                yi.AddRange((double[])yi_);

                {
                    StreamWriter sw = new StreamWriter("sample_init.csv");
                    for (int i = 0; i < x.Count; i++)
                    {
                        sw.WriteLine(string.Format("{0},{1}", x[i], y[i]));
                    }
                    sw.Close();
                }

                {
                    StreamWriter sw = new StreamWriter("sample_interp.csv");
                    for (int i = 0; i < xi.Count; i++)
                    {
                        sw.WriteLine(string.Format("{0},{1}", xi[i], yi[i]));
                    }
                    sw.Close();
                }
            }
        }
    }
}

≫ 続きを読む

2021/02/17 コンピュータ   TakeMe
タグ:Python